WordPress is a popular content management system (CMS) that enables you to effortlessly create a blog or website. This article will show you how to start a WordPress blog and how to use WordPress to create blogs.
You need to create a self-hosted WordPress site to start a WordPress blog. This means that you will need to purchase a domain name and web hosting. After you have purchased a domain name and web hosting, you can install WordPress on your website.
In order to use WordPress to create blogs, you need first to install the WordPress software on your website. After WordPress is installed, you can create new posts and pages and customize your website’s appearance.
Learn how to start your own WordPress blog in this straightforward step-by-step guide. In just minutes, you can have your blog up and running!
Step 1. WordPress Setup
Choosing the wrong blogging platform is the most common blunder made by novice bloggers. Fortunately, you have arrived at the right place so that you will not be making this mistake again. In addition, because WordPress is open-source and therefore completely free to use, you may add plugins, customize your blog appearance, and, most importantly, generate money from your site without any limitations.
WordPress is also the most popular website platform used by most bloggers. You will be surprised by the statistics that 42% of the internet’s websites utilize WordPress! So, what’s the deuce? There’s no catch. It is free because you have to set it up and host it yourself. To put it another way, you will need a domain name and web hosting.
A domain Name is Your web address. It is what people type in order to reach your website. It is the internet address for your site. Consider Google.com or Wikipedia.com as examples. Your website’s files reside on a web host. It is the internet version of your home. Web hosting is required for every website.
Starting a website may be expensive, especially if you are new to the field. For example, a new domain name costs approximately $14.99 per year, and web hosting plans typically cost around $7.99 per month. That is a lot of cash for novices who are just getting started in their business careers.
Let’s go ahead and get your domain and hosting set up.
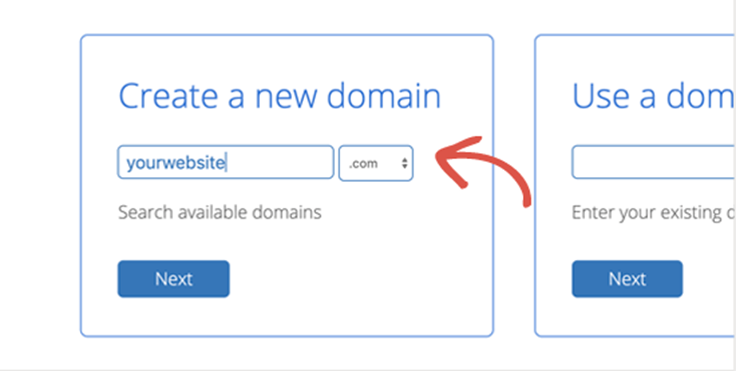
1 – Start by opening Bluehost in a new browser window. To begin, select the green Get Started Now button.

2 – Select the plan that best fits your requirement from beginning to end. Then you will be prompted to provide your website’s name.
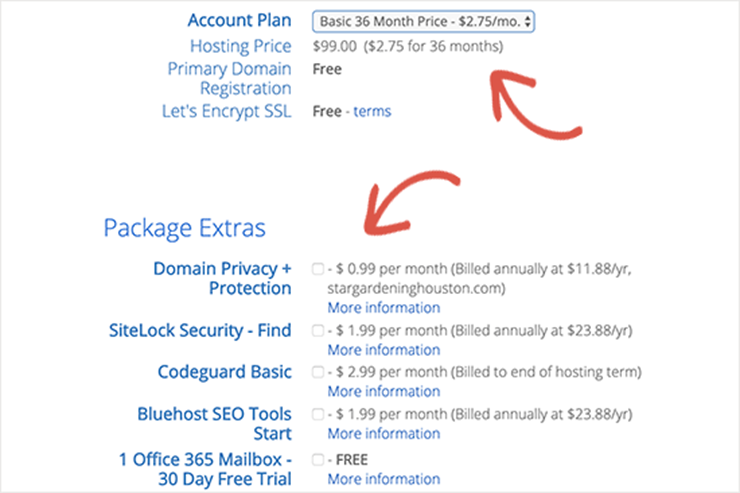
3 – Finally, you must supply your account information and finish the package details to complete the procedure. We recommend opting for a 36-month plan because it is the most cost-effective option. In addition, it allows you to stretch your first-year savings by three years.
4 – On this screen, you will see additional options that you may pick. Whether or not you choose these items, however, we usually do not recommend purchasing them immediately. Instead, you may always later add them if you feel the need for them.
5 – When you are done, you will get an email with instructions for logging in to your cPanel, which is your web hosting control panel. This is where you handle everything from support to emails and install WordPress.
Step 2. Installing WordPress
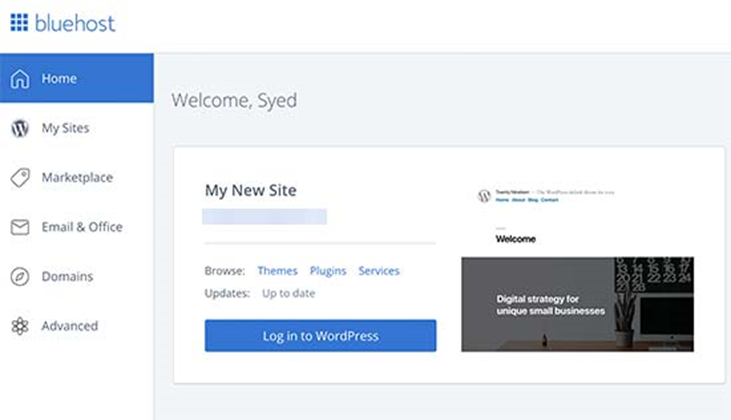
When you register for the new version of Bluehost using our link, WordPress will be installed automatically. This latest version was released to make it easier for non-technical people to start their blogs.
- All you have to do now is login into your Bluehost account and then click the Login to WordPress button.
- By entering your WordPress login details on your computer, you may log in to the administration area of your site. You can also access it by going to yoursite.com/wp-admin/.
- You can now customize and make your blog unique by changing its appearance. You are ready to blog when WordPress is installed.
Step 3. Choosing Desired WordPress Theme
WordPress blog themes are responsible for the look and feel of your site. Your blog will initially appear like this:
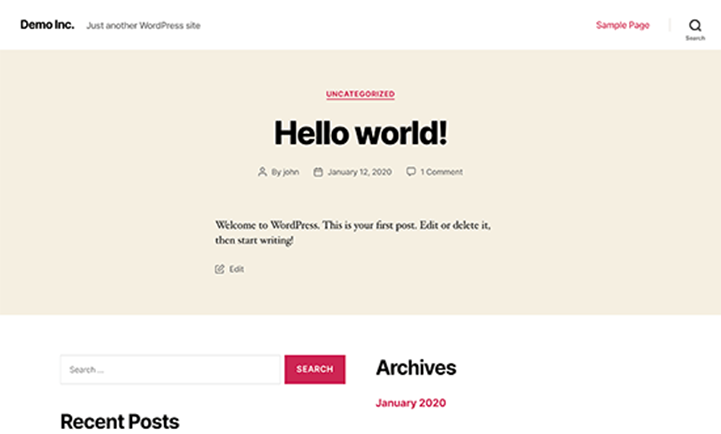
This is not particularly attractive to most individuals. However, customizing the appearance and feel of your WordPress blog is by far one of the most thrilling and gratifying aspects of the process.
There are many pre-designed WordPress themes that you can install on your website. Some of them are free to avail, while others can be purchased.
1 – You can add your preferred WordPress theme by visiting the dashboard and selecting Appearance > Themes.
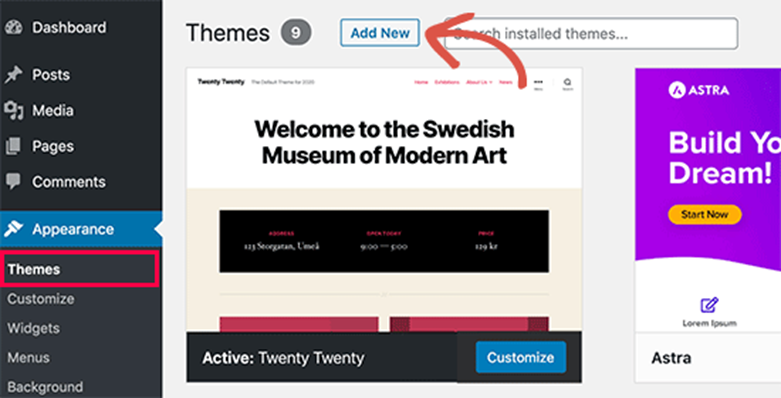
2 – Select the Add New button.
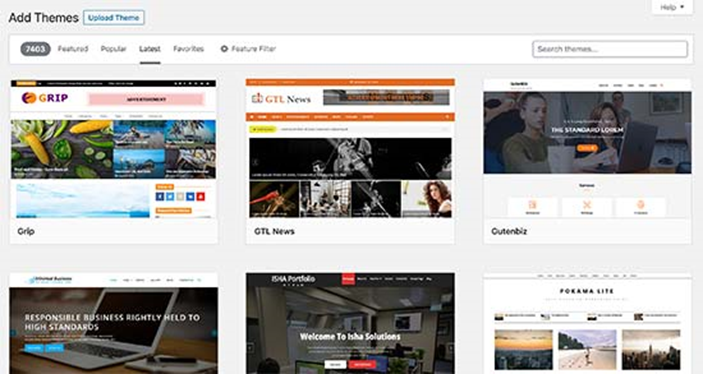
3 – On the following screen, you can access the official WordPress themes directory, where you can opt for any theme from over 9000 free WordPress themes. In addition, you can arrange the list by popularity, most recent, featured, and other criteria (layout, industry).
4 – Moving around the mouse cursor over different themes will show a ”preview button”. Clicking on the Preview button will allow you to view how the design would look on your website after selecting it.
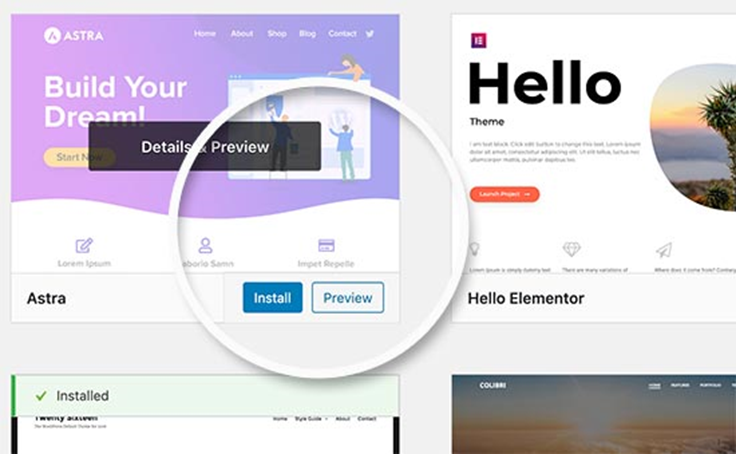
The preview of your theme may not appear to be as depicted in the screenshot, which is understandable since you will have the opportunity to modify and customize it later. Then, all you have to focus on is the design, color schemes, typefaces, and other features.
The most effective tip for selecting the ideal WordPress theme is to avoid over-complicating things. It allows you to keep your site neat and clear while still providing a pleasant customer experience.
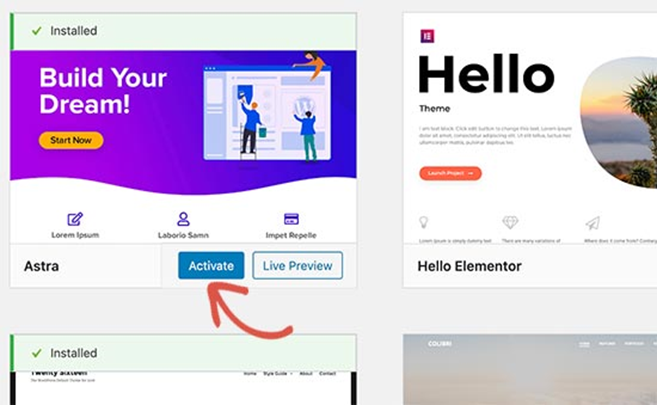
5 – You can now customize the theme by going to Appearance>Customize.
There are widgets and customizations that allow you to change your blog design based on your requirement.
With a WordPress page builder like Divi, you can create your own header, footer, sidebar, and more without any HTML code.
These plugins provide greater design control than Squarespace while also giving you complete freedom with the powerful WordPress.
Congratulations, you are now ready to start writing your first blog piece.
Step 4. Building Your Own Blog Post
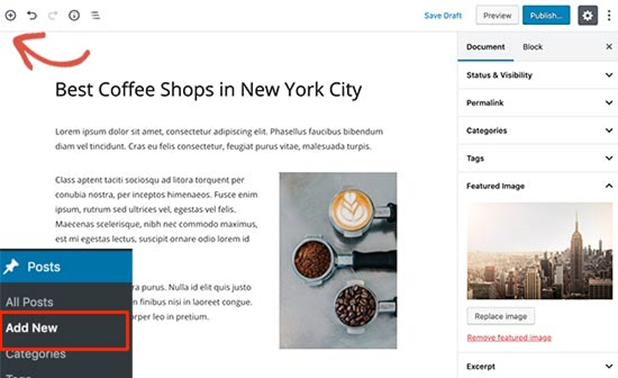
1 – Go to your WordPress dashboard. Select Posts > Add New to create a blog. You will find an editor space where you can create your first blog.
WordPress employs a block-based editor, which means every component is a block. This enables you to produce stunning blog post layouts.
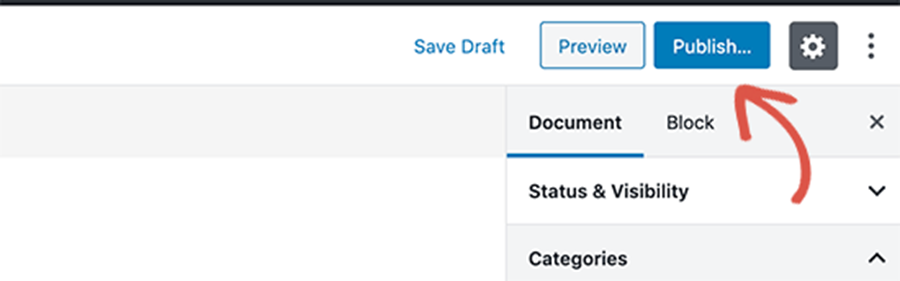
2 – Go to the upper-right corner of the screen and click on the Publish button. Your blog is now online.
3 – There are many more options on the posts screen, including Categories and Tags. These may be used to sort your blog articles into categories.
It helps you with the ins and outs of video embedding, blog photos, bullet lists, headings, content tables, call-to-actions buttons, and more shortcuts in WordPress.
Step 5. About Plugins & Customizations
You will now need to start putting other typical features on your websites like contact forms, photo sections, sliders, email lists, and forums after writing your first sample blog article. For this, you need to use plugins. Plugins are apps that add improved functionality to your website.
There are over 50000 WordPress plugins accessible in the plugin repository for free. This implies that there is a plugin available to tackle whatever you want to achieve.
Let’s look at how to integrate plugins with WordPress to provide some essential features for your site.
1 – Contact Form
A contact form is required for every website. It allows your visitors to email you directly. However, because WordPress does not have a built-in contact form, you will need a WordPress form builder plugin in order to add one.
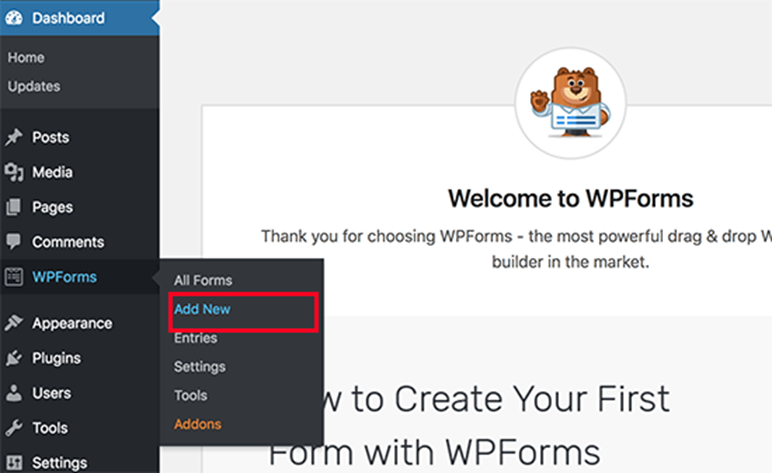
1 – You may install the plugin by going to Plugins » Add New and searching for WPForms in the search bar. Then, after that, you must click “Install” and “Activate.” Post activation, Go to WPForms > Add New page to create your first form
You will now see the WPForms builder interface.
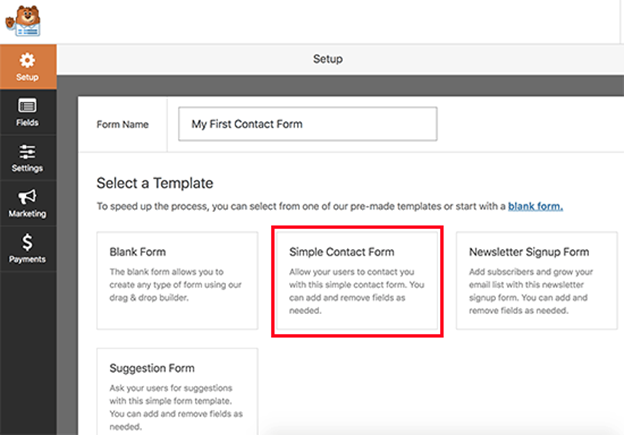
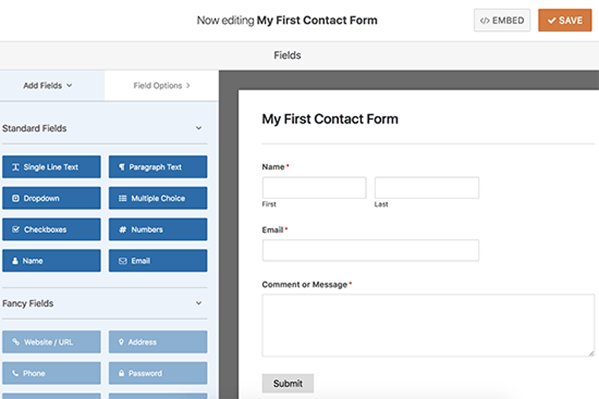
2 – To begin, choose a name for your contact form and then select the ‘Simple Contact Form’ template.
3 – WPForms will now produce an extremely basic contact form for you with all of the essential fields to provide you with a contact form as simple as possible. You may modify any field by clicking on it or adding a new one from the left column.
4 – Click on the Save button in the top right corner after you have finished modifying the form, then close out the form builder.
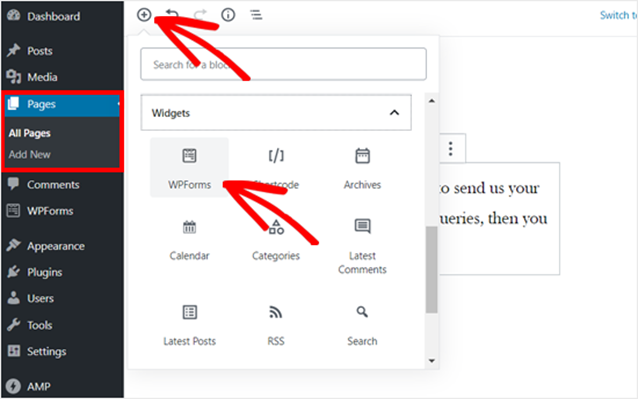
5 – You may now conveniently establish a new page in WordPress by going to Pages » Add New and naming it ‘Contact.’ On the edit screen, you must include the WPForms block into the editor.
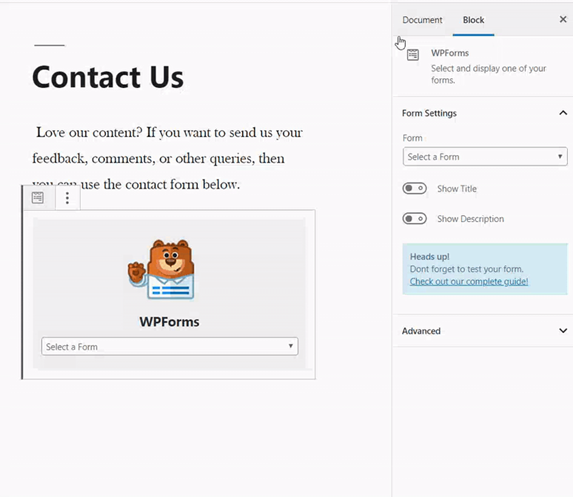
6 – Post that, choose the form you made from the drop-down menu, and WPForms will display a live preview of the form in the editor.
7 – You will now be able to save and publish the page. Next, visit the page in your browser to see how your contact form looks. It is a good idea to test your form to ensure you are getting all of the notifications.
The best thing about WPForms is that it evolves with you as a blogger. You may use it to generate surveys, polls, and more apart from the primary contact form’s function.
2 – Setup for Google Analytics Monitoring
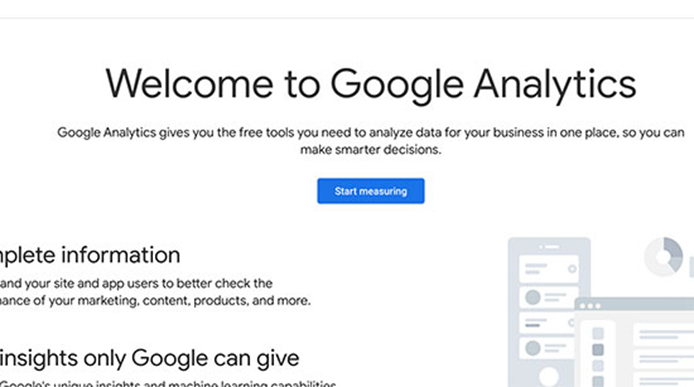
Google Analytics is a tool that allows you to monitor how many people are visiting your blog, where they’re coming from, and what they are doing on your website. It is best to install Google Analytics when beginning a new blog so you can see how it has developed over time.
1 – First, visit the Google Analytics website and log in using your Gmail account. After you have logged in, you may join up for a free Google Analytics account right away.
2 – You will need to supply your name and website URL. You will be then given a Google Analytics tracking code.
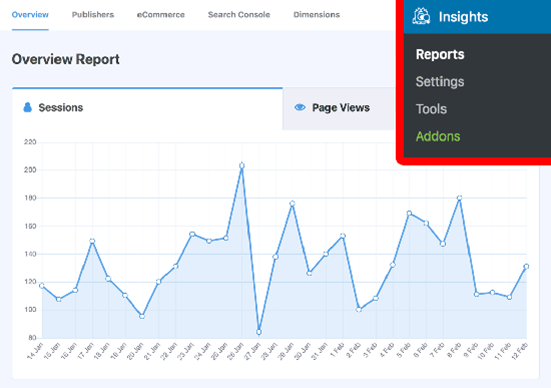
3 – To install and enable the MonsterInsights plugin, log in to your WordPress administration area. It is the lightweight, free version of the best Google Analytics plugin for WordPress, and it is the simplest method to add Google Analytics to your site.
4 – Post activation, go to the Insights » Settings page to integrate the plugin settings.
5 – Go to the settings page and select the ‘Connect MonsterInsights’ button to integrate Google Analytics into your WordPress site.
6 – Complete the installation by following the instructions. You will be able to view your website analytics report right from your WordPress dashboard’s MonsterInsights tab after the setup.
3 – Optimizing Your WordPress Blog for SEO
SEO, or search engine optimization, is the practice of improving the ranking of your website on search engines. When people are looking for information online, they will use search engines such as Google, Yahoo, and Bing to find websites to answer their questions.
If you want your website to be found by more people, you need to practice SEO. This section will show you how to optimize your WordPress blog for SEO.
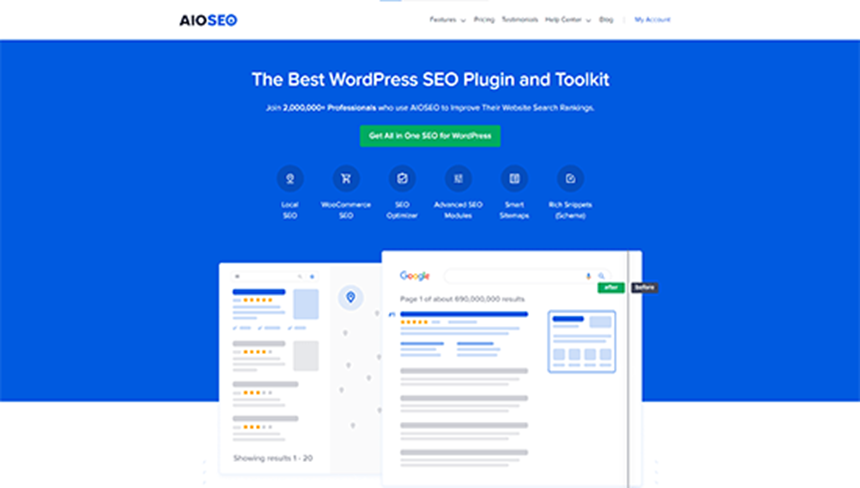
First, you will need to install and activate the Yoast SEO, RankMath, or All in One SEO plugin. It’s a comprehensive WordPress SEO plugin that will aid you in improving your blog’s rankings.
The tool also comes with a simple setup wizard to assist you in getting started. It will walk you through creating a WordPress sitemap, writing correct keywords and meta descriptions, and many more.
You can enhance your blog’s content by utilizing a keyword research tool. These SEO technologies assist you in generating new topic-related content suggestions that people are seeking on Google, moulding your content accordingly, and generating a kickstart on the blog site traffic.
4 – More WordPress Plugins and Customizations
WordPress plugins and customization are an essential part of the blogging process. They can help you to get the most out of your website and make it more user-friendly for your visitors.
We will cover plugins that are essential for all WordPress blogs –
- Wordfence is a plugin that helps to protect your WordPress website from hackers and malware. It scans your website for malicious files and code and alerts you if it finds anything. It also includes a firewall to help protect your website from unauthorized access and features such as two-factor authentication to keep your blog safe from hackers.
- Push Engage is another essential plugin for WordPress blogs. It enables you to send push notifications to your website visitors, allowing you to keep them updated with new posts and articles. You can also use PushEngage to send notifications about sales and promotions or any other important news.
- Jetpack is a plugin developed by WordPress.com that provides a host of features and options for WordPress websites. It includes features such as social media integration, site stats, security, backup, and more.
- RafflePress is a plugin that allows you to create and run raffles on your WordPress website. You can set up raffles for prizes such as products, services, or tickets to events.
- SEMRush is a tool that helps you research and optimize your website for search engine traffic. It provides information such as the keywords that your website is ranking for, the traffic that your website is receiving, and more.
You can use SEMRush to improve your website’s SEO and to find new opportunities to increase your website’s traffic. - WPML is a plugin that allows you to create multilingual WordPress websites. It enables you to translate your website into multiple languages and to create multilingual menus and posts.
- SeedProd is a plugin that helps you to create beautiful Coming Soon and Maintenance Mode pages for your WordPress website. It’s easy to use and allows you to create custom pages with your own branding.
- Constant Contact is a plugin that allows you to easily create and manage email newsletters for your WordPress website. It is easy to use and provides a range of templates and design options.
Step 6. Monetizing Your Blog
Now that you have a great blog, it is time to start making money from it.
In this section, we will show you some of the best ways to make money from your blog.
A – Ad Networks like GoogleAdSense
One of the most common ways to monetize a blog is by displaying advertising. You can do this by signing up with an ad network such as Google AdSense or selling advertising directly to businesses.
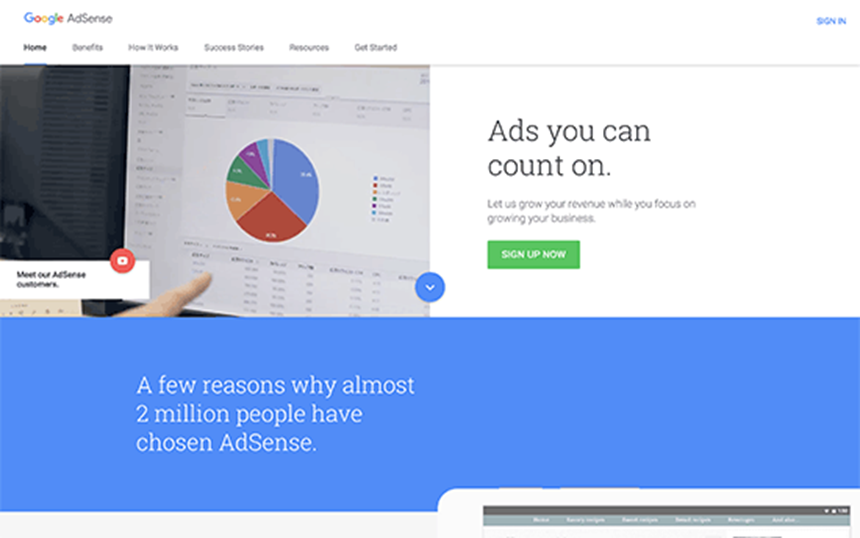
Google AdSense is a program that allows you to display ads on your website. You simply add a few lines of code to your website, and Google will provide advertisements that are relevant to your content. Google AdSense is free to use, and you can earn a commission on the ads that are displayed on your website.
You can sign up for Google AdSense via https://www.google.com/adsense/
B – Affiliate Marketing
It is another common way to make money from a blog.

Affiliate marketing is where you promote products or services for a company and earn a commission on sales that are generated through your website. There are several affiliate programs available, and it is important to choose ones that are relevant to your blog topic.
The secret to affiliate marketing is to express your support for high-quality items and services that you trust and have personal experience with. Several WordPress plugins and applications can help you generate extra money by advertising affiliate items. ThirstyAffiliates is a good tool for this.
3 – Selling Products and Services

Another way to make money from your blog is by selling products or services directly to your readers.
This can be done in a number of ways, such as through online courses, digital products, or physical products.
- Online courses are a great way to sell products or services directly to your readers. For example, you can create a course on a topic that you are an expert in and sell it through your website.
- Digital products are another great way to sell products or services directly to your readers. This could include e-books, audio courses, or video courses.
- Physical products can also be a great way to make money from your blog. For example, you could create your own line of products or partner with a company to sell their products through your website. One of the best and most commonly used plugins is WooCommerce.
D – Selling Sponsored Posts
Another way to make money from your blog is by selling sponsored posts. Sponsored posts are blog posts that are paid for by a company. The company will usually provide the content for the post, and you will simply post it on your website. Sponsored posts can be a great way to make money from your blog, and they can also help increase your website’s traffic.
Step 7. Becoming a WordPress Master
By now, you have learned everything, so it is time to start mastering WordPress.
In this section, we will show you some of the best ways to learn WordPress and improve your skills.
- WordPress Codex
The WordPress Codex is the official documentation for the WordPress software. It contains everything you need to know about how to use WordPress.
The Codex is divided into the Basics and the Advanced Topics. The Basics section covers everything you need to know to get started with WordPress, while the Advanced Topics section covers more advanced topics such as plugin development and theme development.
- WordPress Forums
WordPress Forums are a great place to learn WordPress and get help with any problems you may be experiencing. There are a number of different WordPress Forums, but the best one to start with is the official WordPress Forum. The WordPress Forum is a great place to ask questions, find solutions to common problems, and learn from other WordPress users.
- WordPress Videos
There are several different WordPress videos available, but the best place to start is with the official WordPress video tutorials.
The WordPress video tutorials cover everything from setting up WordPress to developing plugins and themes. They are a great way to learn WordPress in a more visual format.
- WordPress Books
WordPress Books are another great way to learn WordPress. There are a number of different WordPress books available, but the best place to start is with the official WordPress book, WordPress for Dummies.
WordPress for Dummies is a comprehensive guide to using WordPress. It is a great way to learn WordPress in a more traditional format.
- WordPress Blogs
WordPress Blogs are another great way to learn WordPress. Many different articles are available online but the best place to start is with the official WordPress blog.
The WordPress blog is a great place to find tips and tricks for using WordPress, learn about new features, and hear about success stories from other WordPress users.
- WordPress Events
The WordPress events page contains a list of all the upcoming WordPress events, including WordCamps, Meetups, and other events. It is a great way to find out about forthcoming WordPress events in your area.